By Taylor Chambers
Preparation – The things often forgotten.
Preparation is key! Before jumping into the vocal mixing processes, you can assist in making this process easier for yourself (and everybody involved), if you take the following factors into consideration as it will ensure optimum results. You won’t only get quicker results, but better-quality results.
Recording Step
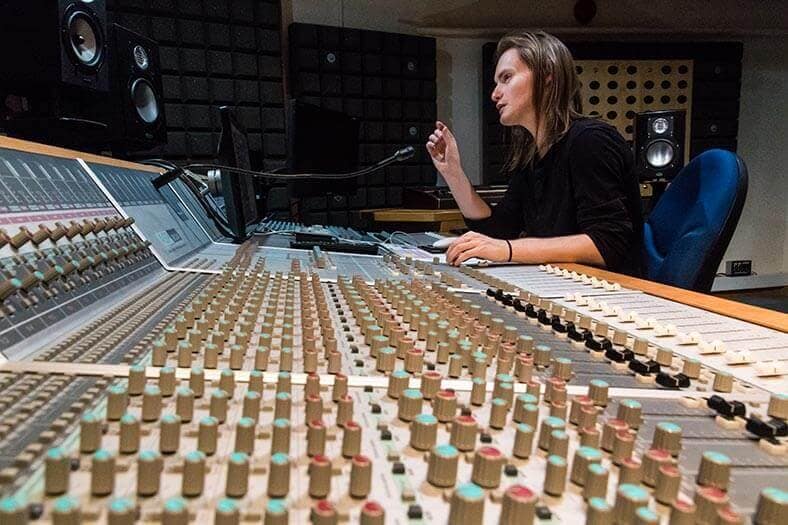
In the first instance, I’d suggest having your artist perform a few phrases from the record and then A/Bing multiple microphones to find the one best suited to your performer. To save time, position two microphones beside each other and record the two simultaneously, then pick from the best.
If you don’t have the luxury of multiple microphones or a super expensive one at that, you can still achieve a great sound. How? Well, correct gain staging, room acoustics, and the performance of the artist are the defining factors that will save you from hours of corrective editing and sleep deprivation.
Now, the fun stuff!
Do your vocal mixes lack warmth, thickness, and clarity? “Yes, what do I do?!” you ask. Well, for starters, beginning with subtractive (corrective) & additive (creative) mixing processes will help you achieve a warm yet transparent vocal tone. More often than not, I’ll begin by using a virtual pre-amp (tube-based for warmth) that has an attached EQ selection available. Unless one was applied during the tracking process that achieves the initial sound I’m after (if you didn’t track the material, liaise with the tracking engineer).
The decision between what initial pre-amp/EQ you should use is dependent on understanding what your vocal requires sonically. Instantly, upon inserting the SonEQ Pro onto my vocal bus, it added subtle warmth that didn’t come across as dissonant or simulated, it emulated analog warmth accurately.
So, right off the bat, you’re halfway there with achieving your warm, detailed vocal. It’s worth noting, I’d recommend doing multiple stages of compression through different types of compressors for different characteristics. If you EQ before compressing, you’ll achieve a warmer tone, after equalizing will result in a much cleaner sound. Your decision is dependent on what you already have and what you are trying to achieve.
The EQ Setting
On the SonEQ Pro, the first rotary fader I’ll jump to is the high-pass filter, rolling off around the 50Hz region and then scoping the area until I’m removing the desired amount of low-end. I’d advise against exceeding 100Hz as you’ll lose the body/fullness of the vocal. Doing this correctly will result in a much cleaner vocal and open up a little space for your low-end based instruments.
A cool trick (especially if you’ve used your available bandwidths) is to boost the Drives level, it will then act as a low exciter that saturates & enhances your low-end, great for adding thickness. Another cool trick (which is one of my favorite functions), is the cancellation and summation capabilities the SonEQ Pro possesses. Giving you simultaneous boosting and attenuating controls over the low band region. A classic vocal mixing trick that this unit undoubtedly achieves and that I have and will continue to use on every mix.
TAKE FULL CONTROL OF THE SOUND WITH EQ
Moving up the frequency spectrum: If your vocals are boxy (sometimes an issue with home recordings) focus your attention on the midrange bandwidth (400Hz – 900Hz). Too little, this bandwidth will result in a hollow sound, too much will result in a boxy sound. Use your ears and make adjustments based on what you hear. Moving further up the frequency spectrum, specifically focusing on the upper-mid region, this is where the crispy details linger. Attenuating this frequency range (1kHz – 6kHz) ever so slightly can assist in letting the warmth from the vocals come to the forefront of your vocal mix.
However, boost around the 4-7kHz region to get presence and crispy detail. Sweep this range until you hear that detail that you’re after. Boost with caution as too much of this frequency range can be quite tiring on the ears. This bandwidth has its own set of troublesome frequencies (harshness/sibilance) that may require reducing depending on how bad it is. Remember, no two vocals will be the same so use your own initiative to find those areas for treating as well as the sweet spots.
I may then use the SonEQ Pro’s high-end sheen as the cherry on top (should the vocal want the cherry). The high-frequency bandwidth on the SonEQ Pro is smooth and can bring out further clarity and sparkle, which I’ve used on every vocal so far. Lastly, depending on how well the vocal sits within the mix, I may insert an additional EQ unit at the end of the signal chain and use that to further carve the frequency spectrum to help the vocal to sit within the mix more accurately.
FINAL EQ ADJUSTMENTS
Be mindful, if there is already enough of a certain frequency, then it’s a process of maintaining it and focusing on anything jumping out at you, good or bad. Regularly check your vocal mix in isolation from the overall mix but do the majority of your alterations within the context of the song so it makes sense collectively. I’ll then add minor bell adjustments via the EQ bands available, this will have a combination of both subtractive and additive processes. Both processes can be achieved through the use of one unit, but sometimes I’ll use multiple units and dedicate each process to a specific unit, just to keep things organized.
The adjustments you make will vary dependent on the vocalist, however, begin by removing the offending frequencies that you feel the vocal could do without. Each bandwidth has its own offending frequencies and isolating the vocal will highlight the ones causing an immediate issue. Don’t cut or boost too generously, both can be detrimental.
In conclusion, I wish I’d known about the SonEQ Pro sooner! It’s an all-encompassing unit that incorporates a variety of my favorite functions that I’d normally have to insert multiple plugins to achieve, speeding up my workflow enormously and now has a permanent place within my mixes.
Taylor Chambers, Recording & Mixing Engineer
Website – www.chamberssounds.com
LinkedIn: linkedin.com/in/chamberssounds/ Facebook & Instagram Pages: @ChambersSounds


Leave A Comment
You must be logged in to post a comment.