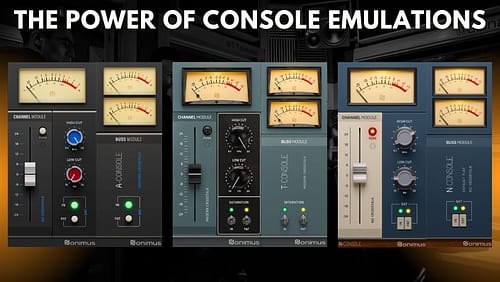
Working with drums on a hard rock mix vs polishing the sounds of the individual instruments laid across the tracks is something that actually requires a similar approach, with only slight differences in tweaking for each channel. It all comes down to saturation and equalization, and SonEq 2 is the perfect tool for that.
Harmonic distortion is one of the best ways to emphasize the crest factor and transient response from a percussive instrument – in other words, saturation, when properly used, will help your drum kit hit harder! Don’t get caught up in those noisy transient shapers, or waste too much time fiddling with an upward expander, try saturation first! Of course, in order to do this the right way and get complete control of the amount of THD induced, you have to gain stage your incoming signal to the plug-in.
That’s the beauty of SonEQ 2 – because it’s modular you can make sure that just the right amount of signal reaches the distortion stage. The recommendation is still to measure the track’s energy using a VU meter with 0 VU = -18 dBFS (there’s lots of freeware plugins out there that will do the job). So, with this in mind, simply add gain or trim your recorded signal going into SonEQ 2 so that the saturation stage from the plug-in does what it’s supposed to do. Inject more signal for a nice distorted sound.
So with this alone we have already accomplished a more percussive, empowered, transient signal with a bigger crest factor and a ‘snappier attack’; as well as a more energetic, sustained sound which tends to last longer (as if compressed) than the unprocessed, raw signal, all without touching the EQ section itself! It’s vital for mixing engineers to look after our signal the entire time throughout the processing chain, instead of aimlessly twisting knobs and pushing buttons in a plug-in, which is secretly what we all want to do.
After this is done, only EQ’ing is left. Additive EQ with the largest Q always seems to work the best for adding energy and changing the timbre, without introducing nasty phase distortion to our signal – which defeats the purpose of introducing the aforementioned saturation. In this respect SonEQ 2 is once more extremely well fitted to the job, due to its large bandwidth curves, and especially the shelving filters. I tend to primarily rely on using those, unless I’m reaching out to the EQ for fixing a specific problem, such as a ringing sound or a bad recording to begin with.
Don’t be shy, boost the high-frequency shelf all the way up! When we’re recording a drum kit everybody is looking for a full-blown, sub-low sound from the drum kick with lots of oomph and resonance. However, during mixing, the bass drums end up being cleaned up in the low-mids, and just emphasized so much in the mid-range for a “clicky” sound that I sometimes wonder why the producer decided upon that original timbre while tracking in the first place! So don’t cut unless there is a specific problem – just boost, and rather in the higher frequencies than the rumbling sub-lows that the mastering engineer is going to wisely cut-off anyway. The same goes for the toms and the snare drums, only an octave or two higher (root frequencies around ~100 and ~200, whereas the power of the kick drum resides between 50–90Hz – if you can even faithfully reproduce those frequencies in your studio – don’t fool yourself!).
To summarise, ditch all those fancy processors and headache-inducing samples that only add noise and unwanted distortion to your sound, and simply focus on having a properly gain-staged signal going into the non-linear processor and one or two points of EQ (if really needed) with the largest bandwidth and smoothest curve possible!
Ezequiel Morfi, Music Producer & Sound Engineer


Just beginning to explore Britson. I am an analog baby since my teens. I am being drawn into happy sound of Britson. I have found other similar plugins to dark and not pretty when applied to all tracks. Britson is my mix buddy. Yay