In this article we want to show you how to apply New York Compression using Sonimus products. Whether you own Tuco or Satson CS, you can benefit from the sound and features of these plug-ins and use them in your sessions to apply this famous technique.
What is NY Compression?
As the name suggests, New York Compression is a technique developed in New York City to add excitement and weight to drums or vocal tracks, but it can also be used for any other audio sources. To achieve this effect, New York Compression relies on the use of parallel compression to increase the harmonic content of the track, and shaping the frequency spectrum to enhance the effect.
All we need to do is to create a pre-fader send of our selected track and send it to an Aux track where the New York Compression will be applied. You can also duplicate the audio track and apply the processing in the new copy, but using an Aux track will keep your session tidy and save resources on your computer.
Step 1- Compression
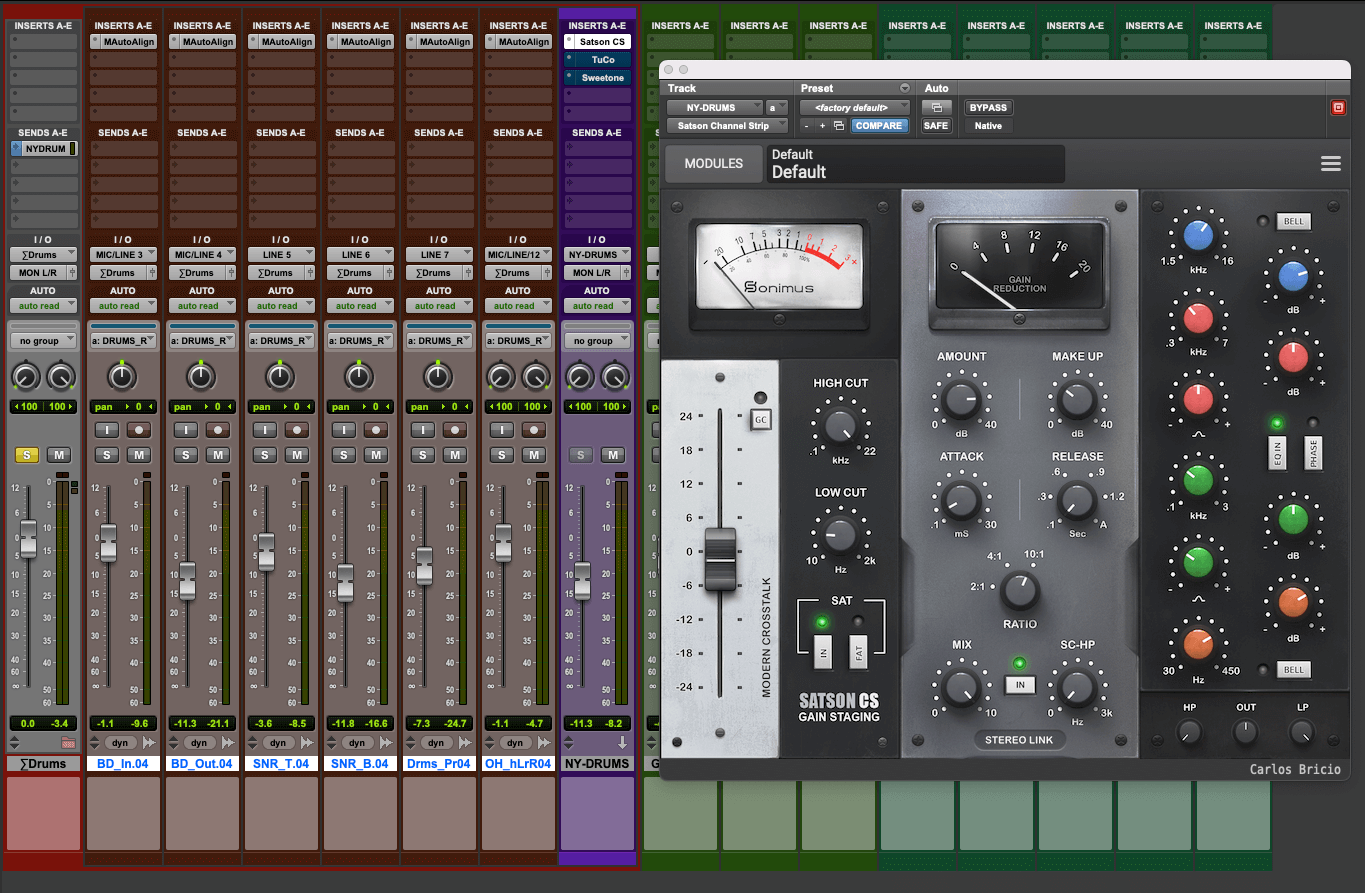
The first thing we need to do to our Aux track (aka New York Bus) is apply heavy compression. If you own TuCo or Satson CS you can just add an instance of one of them as your first insert.
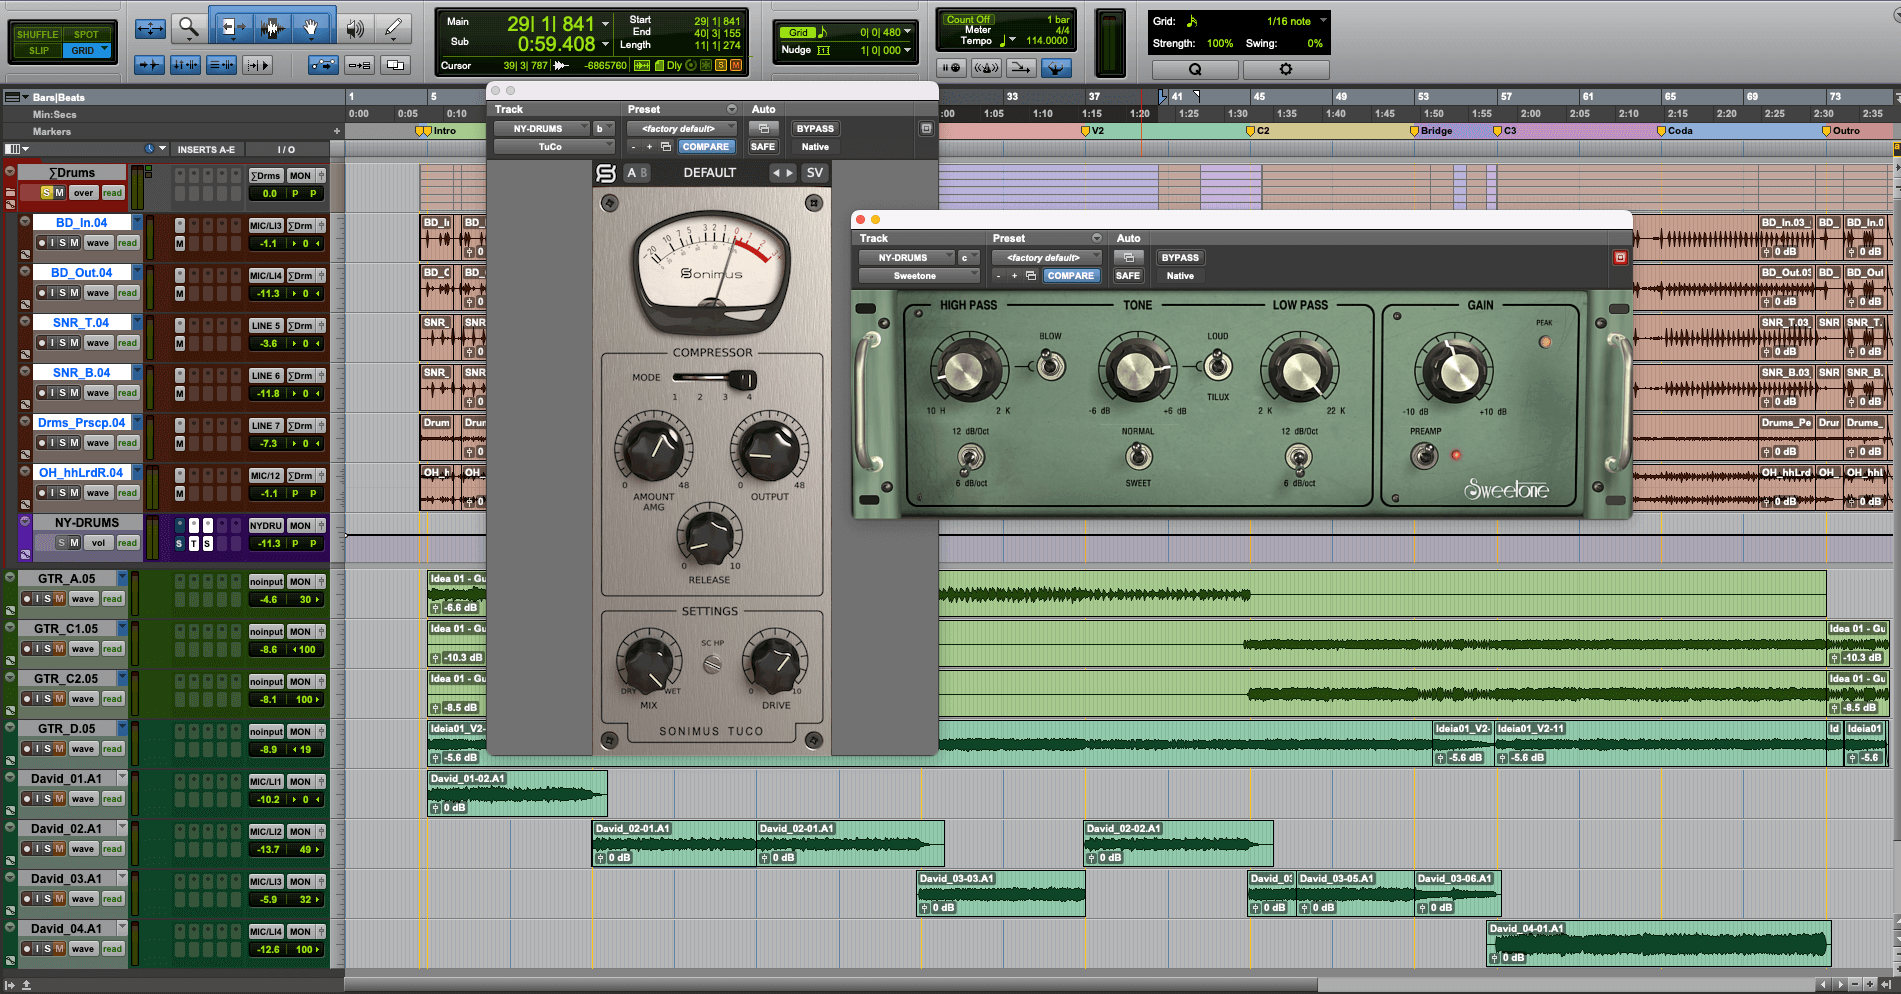
Set the compressor to a high ratio like 10:1 in Satson or the Limiter mode in Tuco. Use fast attack and fast to medium release times to catch all the transients and bring up all the sustain of the sound. In Satson CS set the attack time between 0.1 or 0.3 ms and the release times between 100 ms to 300 ms to obtain a nice result. If you are using TuCo, switch to Mode 4 (limiter – fast attack) and set the release time between 1 and 3. Then just start bringing down the threshold until you get between 8 to 10 dB of gain reduction and compensate with the make-up gain. In Tuco you can enable the Auto Make-up gain by clicking the Amount label and just play with the Amount knob until you are satisfied with the compression applied.
Step 2 – EQ
Once we have a super aggressive sounding track, it’s time to enhance it with some EQ. In this case we need to apply the classic “smiley face” as our EQ curve by shelving the highs and low frequencies. This will add excitement and body to your compressed signal.
You can achieve this with any of the great Sonimus EQ plug-ins, but if you own Satson CS or Sweetone, the process can’t get any easier.
If you loaded Satson CS in the previous step you are good to go since the default setup of the plug-in loads an EQ module right after the compressor. Just set the high band to 10 kHz and the low band to around 300 Hz. Then boost both frequencies by 6 to 10 dB. You can use a subtractive EQ instead by setting your mid-band to around 1.5 kHz, increase the Q value and cut by the same amount. You can use the same settings with StonEQ.
With Sweetone, the settings get even easier. Insert Sweetone after your compressor. Switch to Loud mode and increase the tone knob to taste. You can try the Normal or Sweet mode to get slightly different curves.
Step 3 – Mix it
Once you have finished tweaking your New York Bus, all we need to do is blend it with the original signal. Start with the fader of the NY Bus all the way down and start bringing it up slowly until you find the right level for it. There is no right or wrong — it’s all about your personal taste and what works for your track.
AUDIO EXAMPLES
Once you find the perfect blend, you can group the original signal and the NY Bus together so the balance remains, even if you change the levels in the final mix.
Do you use New York Compression? How do you use your Sonimus products? Let us know in the comments below and don’t forget to subscribe to our newsletter for more information and tips on how to use Sonimus products.


Leave A Comment
You must be logged in to post a comment.