Live streaming and screen-capturing tools have become commonplace in everyone’s lives. Whether you run or watch online workshops, webinars, teach to an audience or create online content, good quality and engaging audiovisuals are essential to deliver professional results.
Lots of people focus on cameras, animations and filters to make their content more attractive, but the truth is that having good quality audio on your streamings can increase the value of any video more effectively. Just by getting a dedicated microphone for your calls or productions will make them feel more professional. But why stop there when you can also process your audio with plug-ins like Burnley 73 or Satson CS and get all the benefits you are used to when recording in your DAW? Thanks to OBS Studio you can do that and more — let’s find out how!
What is OBS?
OBS stands for Open Broadcaster Software. It’s a free and open source software for video recording and live streaming. It allows the user to capture and mix high performance with real time video/audio to create a scene made up of multiple sources, including webcams, window captures, images, text and more. It’s sponsored by many different platforms such as YouTube, Twitch or Facebook, and is trusted by content creators from all over the world.
You can also use OBS Studio to create more engaging video calls using its Virtual Camera feature, which allows you to create a customised video output and send it to your favourite online meeting platform as your camera feed.
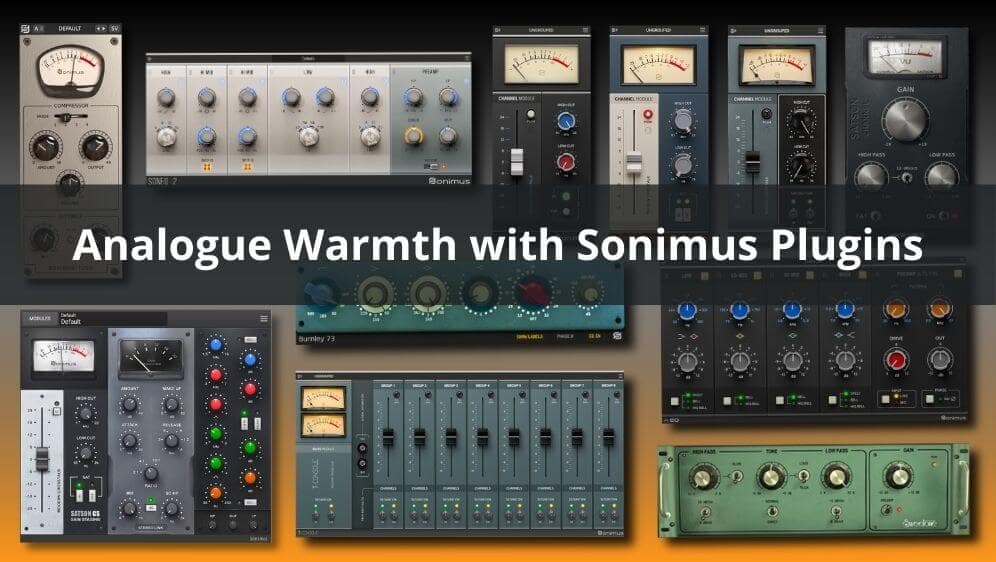
Sonimus Plug-ins in OBS
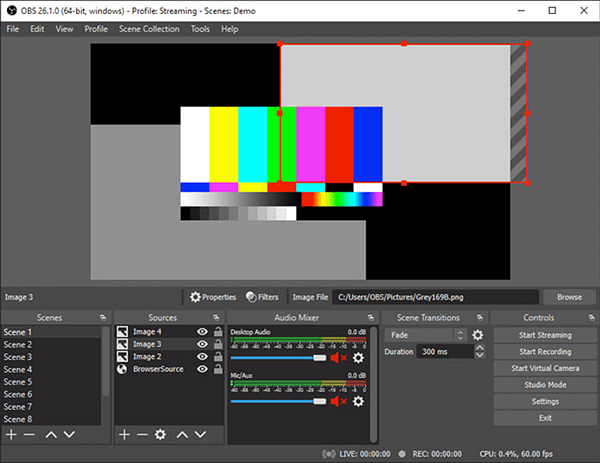
One of the great features of OBS is its intuitive audio mixer, with per-source filters and effects such as Noise Gate, Noise Suppression, and Gain — but what makes it truly outstanding is the ability to take full control of your audio with VST plugin support. This allows you to run plug-ins on each audio source on OBS just as you would in your DAW channels. Whether you are on PC or Mac, any of Sonimus’ installers will provide VST versions that get installed on your machine.
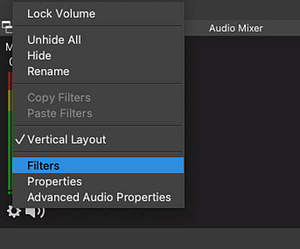
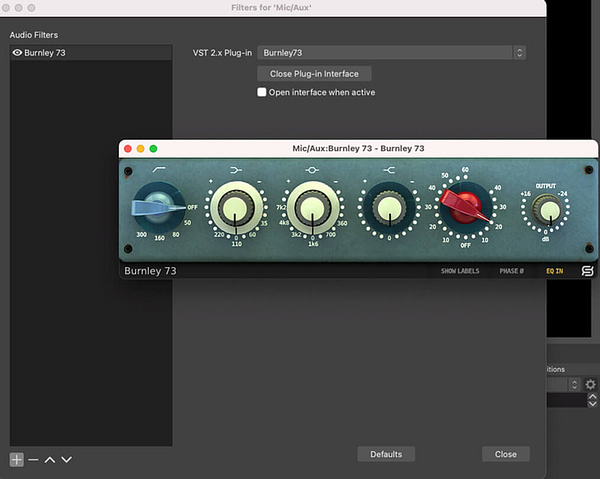
On OBS, everytime you add a video or audio source, they will appear on your mixer. By pressing the cogwheel on each channel and selecting Filters, you will be prompted with the Audio Filters window for that specific channel (similar to the Inserts in your DAW). Press the plus button on the bottom left corner and select VST 2.X Plug-in. Rename the effect accordingly and then select your favourite Sonimus plug-in from the dropdown menu. Now just Open Plug-in Interface to start tweaking the audio.
Processing Your Audio Sources
In one of our previous articles we gave you 5 tips for getting started with podcasting that can also be applied to step up the audio game in your livestreams. In this case instead of applying the processing in post, you would be doing it live.
Starting with some filtering, EQing and basic compression to shape and control your audios can make them more crispy and present. Burnley 73 or StonEQ 4k are great options to get nice and clear sound from voice-overs or audio sources with only a few knob movements. If you want to make more broad EQ moves, Burnley 73’s semi parametric 3 bands will be perfect. But if on the other hand you want more surgical control, StonEQ’s fully parametric EQ will allow you to dial the right frequency to add or subtract to your source.
Alternatively, using Channel strips plugins have the benefit of having everything that you might need for processing audio in just one place. Satson CS, with its modular workflow, can be a workhorse in any stream since it can bring all the power and analog sound from a big console into OBS with EQ, compression and saturation. A fully featured broadcast studio at your fingertips.


Leave A Comment
You must be logged in to post a comment.